Ok...so I've been thinking about this for quite some time.
Official wedding recaps are upon us, and you have all been loyally following me here on this blog. However, in the past few months, Blogger has been giving me a ton of problems. One of these problems includes transferring my Weddingbee posts over. You see, I compose my Weddingbee posts in WordPress...and for some reason Blogger is giving me a heck of a headache when it comes to copying them over...the photos will not load for me. After failing about 20 times at copying my first recap over, I realized that I would have to upload each and every photo again through Blogger to post it here. For those of you who have already gone through the process of wedding recaps, you know how long it takes to compose one post...uploading photos alone takes a LONG time! I just can't do it for two different blogs...there isn't enough time in the day!
So, this is what is going to happen: I will be posting all of my wedding recaps on my NEW blog -
Please please please head over there now and subscribe if you haven't already. I would hate for those of you who have been so amazing and supportive during my wedding planning to not be able to see the final results! And, guess what? My first recap post is up today - so get excited!
Thanks again to all of you for following me on my wedding planning journey - I am excited to share my day with you!

Showing posts with label wedding. Show all posts
Showing posts with label wedding. Show all posts
Thursday, October 28, 2010


Wednesday, October 27, 2010
Lovely Tonight: My Last Night as a Miss
After the rehearsal dinner, our out of town guests headed back to the hotel. Conveniently, my suite was connected to my parents' suite...so we opened the two rooms up for everyone to mingle!


We opened up a few bottles of wine, and the guys enjoyed some of the beer that was left over from the beach party that afternoon. We chatted, watched some sort of sports game that was on TV, and just enjoyed everyone's company.


Little by little, our guests trickled out of the suites and back to their rooms to retire for the night. However, sleep was the last thing on my mind. In the week before the wedding, I had been so busy and was trying not to focus too hard on projects. But, by doing so I completely forgot to finish creating Mr. Buttons' wedding day gift! D'oh!!!! Thank goodness that BM A and L were still willing to hang out with me. After a quick change to PJ's, they helped me to cut paper and arrange the photos from my "beach boudoir" session into an album. I also wrapped up my "gag gift" portion of his present: a screen printed shirt that I had made for him. Here...I'll show you - Mr. Buttons proudly wore it the day after our wedding, and everyone was taking photos/laughing at it:

In retrospect, I suppose I didn't really have to have the presents prepared for Mr. Buttons because he never opened them during the time he was getting ready on the day of the wedding! I had them delivered to the beach house where the guys were, but apparently he never saw the gift. Thankfully, someone delivered them to the venue, so I WAS able to give him the presents...but not until after the reception was over!
Anyway, after the presents were wrapped and ready to go, BM A and L retired to their room...and I was alone.
Could I sleep? No, not really. I sat up for an hour or two, going over the timeline of events for the next day. I triple checked our guest list and escort cards and I went over the vows one last time before retiring to my bed. At that point, I attempted to quiet all of the little nagging voices I was hearing in my head in order to get some beauty sleep. However, I was like a kid trying to get to sleep before Christmas...I was just so excited for the next day!
Were you able to sleep the night before your wedding?
Need to catch up?
Wednesday, October 13, 2010
Sorry I've been MIA lately...
Hello everyone! I just wanted to pop in to say 'hello!' I know I've been slightly MIA with my wedding recaps lately, and I promise you that they are coming! However, I do have something pretty for you to look at in the meantime...

Pilster Photography
Our wedding was featured on Elizabeth Anne Designs' blog yesterday. Yes...some of my recaps might be given away with this post. However, I'd love it if you stopped over, took a look, and maybe even left a lovely comment!
Go to the blog post HERE
I hope you are all having a fabulous week!
Friday, October 8, 2010
Lovely Tonight: The Rehearsal Dinner
After a lovely afternoon of sun and fun at our beach party, it was time to get pretty for our rehearsal dinner! I rushed to our hotel to jump in the shower and threw on my dress, and then it was time to head to the hotel lobby to start a caravan for our guests! Remember our rehearsal dinner nightmare? Our OOT bags/info featured directions on how to get to the restaurant. Well, since plans had changed, my mom and dad organized a caravan for our friends and family to get to the NEW rehearsal dinner location. Thankfully, we all arrived in one piece!

Uncle D, Aunt S, and Grandma & Grandpa Buttons

BM K and MOH L had a chat while they waited for dinner to start. MIL Buttons made all of the pretty flower arrangements herself!

Sorority sister J, Sorority sister (my twin) M, my great grand little J, and her boyfriend

Grandma, Aunt J, Cousin J, Aunt S, and Uncle J

BM K and MOH L with their fiances

BM L, BM A, Sorority sister J, and her boyfriend
I had been pretty upset when we first learned about our closed rehearsal dinner restaurant, but our new location was fabulous! It was right on the water, and our guests were able to enjoy a beautiful sunset, along with a few dolphin sightings to boot! The staff at the restaurant were MIRACULOUSLY able to recreate our original menu...I was so amazed! Although it wasn't the enormous Italian feast that we had been expecting at our original location, we were all fed, the food was delicious, and we were all together!

BM L was awesome enough to remember to photograph her appetizer plate...

...and her yummy tiramisu...
We posed for a bunch of photos after dinner was complete; you have to get group shots when your girlfriends are all together for the first time in years!

...with BM L...

...with BM/little sister A and great grand little J...

...posing with our adorable ringbearer...

...all of the ladies together again!

...Justin and I had to take at least one photo together...
A band started playing, and my mom danced with GM J. The other people in the background are random patrons of the restaurant that joined in!

GM J then tried to convince Justin that he had made the wrong choice of who to marry the next day (just kidding...he's married too, for the record), but Justin was having none of it!

Then...it was back to the hotel for an "after party" to complete our evening!
Need to catch up?
Wednesday, July 21, 2010
It wouldn't be a wedding without something going awry...
I already alluded to the fact that when BM L, A, and I drove past the rehearsal dinner location, I thought something looked strange. At that moment, I put it out of my mind, but nevertheless, it kept bugging me.
When we returned to the beach house, my cell phone rang. It was my mom, and she had some interesting news. Justin's mom had arranged with the rehearsal dinner restaurant to drop off the centerpieces on Friday morning so she wouldn't have to worry about them on Saturday. She had arrived at the restaurant that morning to discover the doors were closed, chained, and padlocked! She had spoken with the manager that Tuesday, only 3 days earlier...and there seemed to be nothing wrong at that time. However, at some point between Tuesday and Friday, the restaurant had closed. And, of course...they hadn't informed Justin's mother of this.

So...there we were...without a rehearsal dinner location for the following evening. If it was a small dinner, I might not have been concerned. However, our rehearsal dinner was scheduled for 60 guests, and it was being held on a Saturday night....on a holiday weekend. As soon as my mom told me the news about our original restaurant closing, I could feel my heart (and stomach) drop down to my toes. This...was...not...good!
Now, I'm going to pause the story for a moment. During my planning process, I constantly was hearing how there really is no way to avoid at least one thing from going wrong in relation to your wedding day. I wholeheartedly agree with this statement. Something IS going to go wrong at SOME point during your wedding festivities. But, you know what? Things have a way of working themselves out. Breathe in...breathe out...

At first, I thought that our rehearsal dinner was going to be a catastrophe. How in the world were we going to resolve this problem in less than 24 hours? I figured that we would have to order pizzas and eat them in our hotel lounge, or something to that accord. Well, luck happened to be on our side. Justin's mother had frantically searched around the area, and ended up visiting a restaurant where Justin's brother had held his rehearsal dinner a few years back. They were able to accommodate the size of our group, AND they were willing to recreate our menu to the best of their ability (our guests had already pre-selected their dinner choice for the evening). Problem solved! The only thing we had to do now was to inform our guests of the new location, and give them directions! Sigh of relief? Indeed. Crisis...averted!
Have you had a moment of panic during your wedding planning?
Wednesday, July 7, 2010
Married for a MONTH!

Last week (exactly last week, actually), Justin and I celebrated one month of marriage. Woo hoo! Who knew that a month could pass by so quickly?
Justin and I decided that we didn't want to wait an entire year to eat the top tier of our wedding cake; we don't have the space in our freezer, and we were concerned that in 12 months our cake would simply not taste as good as a fresh one. So, the top tier was defrosted in preparation for our evening!
After a delicious dinner, we popped open a bottle of champagne and prepared to cut into our cake!
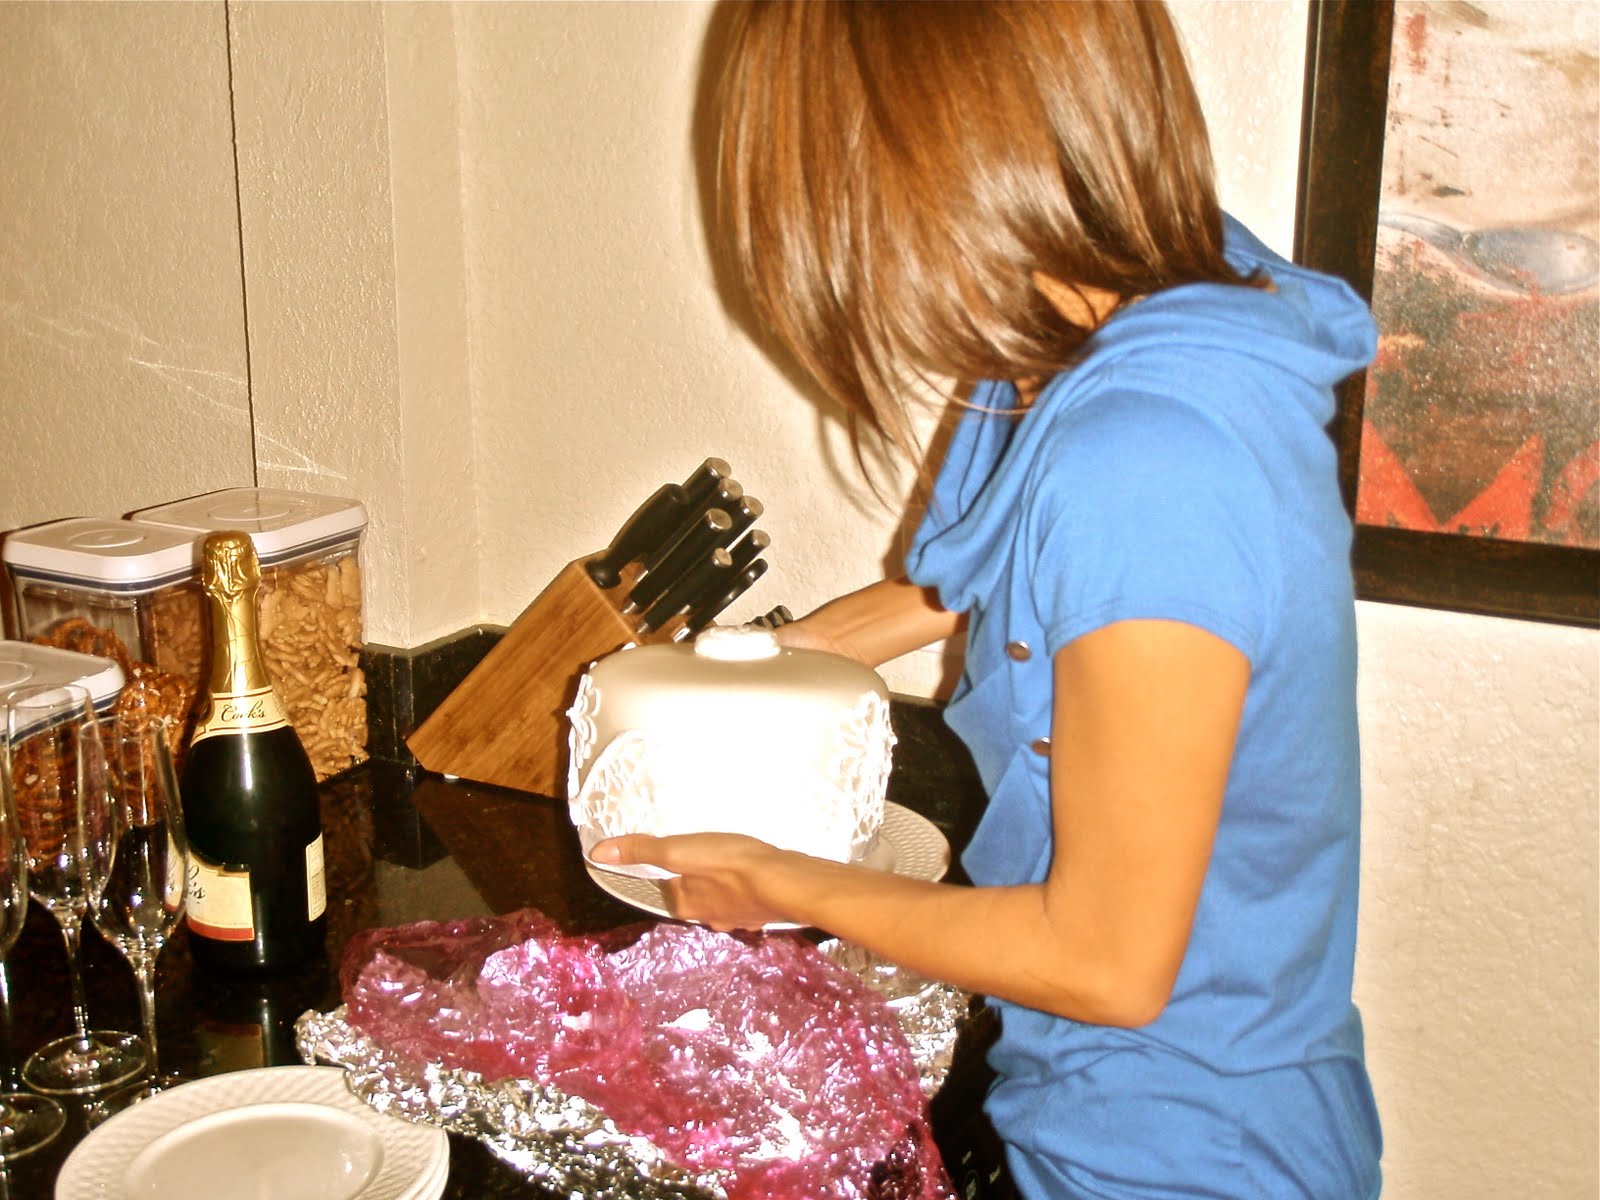


I was surprised at how good the decorations on the outside of the cake held up! Yes, some of the lace work cracked and is no longer straight, but considering it was wrapped in plastic wrap and aluminum foil for a month, I was impressed!

Oh, how I wish I had the pro pics of the entire cake from the wedding day - can't you tell it was ridiculously gorgeous?!?! Ohhhhh ok...I'll let you have a peek of the entire cake in all its glory, as captured by one of our guests:

I was in love with it. Clearly.
We had selected two different flavors of cake for the wedding: chocolate kahlua creme and amaretto. Justin and I had no idea what flavor the top tier was going to be until the knife went into the cake! Surprise - it was amaretto (which was great, because both of us had the chocolate kahlua during our reception)!


Um...I was really excited about eating some cake, can you tell???

And I'm sure you are wondering, how did it taste? I was definitely a bit concerned, as month (or year) old cake has had mixed reviews from a number of other brides. However, we were extremely lucky; our cake tasted just as good as it did on the day of the wedding! It was still extremely moist, and the flavor was fantastic! I think that the white chocolate fondant was what helped; I'm no scientist, but I think that the fondant sealed in the freshness of the cake! Yum!


Wednesday, June 9, 2010
I think its safe to say we had a good time...
Oh hey there everyone! Guess what!?!
Chicken butt!
Ok, ok...I swear I'm not 6 years old. But I'm oh so happy to return to you as a MARRIED woman! Woo hoo! It feels good...it feels really good!
Justin and I have been pretty busy in the past week (moving into a new apartment is exhausting!). And, as I am (im)patiently waiting to see our pro photos, I did want to take some time to complete some of the posts that I didn't have the chance to share with you in the weeks before the wedding! I was a busy little bee, constructing a good deal of DIY projects, having a lovely bachelorette party/wedding shower, and the like!
And, I wouldn't leave you hanging without at least ONE teaser of the fun we had at our wedding! The following photo is cropped, because I can't possibly give away the awesomeness that is happening in the other half of the photo until I have the time to fully describe the scene. I promise to show you the full picture (excuse the poor quality for now), but you're going to have to wait...just a little longer!

Ok, I think we can also have some fun with this - leave a comment and guess what is actually happening in this photo! Gosh, I've missed you guys - it is great to be back! :)
Thursday, May 6, 2010
Ginormous hair flower: a tutorial

After a multitude of requests for a hair flower tutorial after debuting my ginormous creation the other day, your wish is my command!
A few months ago, you may recall that I showed you my fabulous hair flower find from Etsy. At the time, it was perfect; it matched my dress, had lace detailing and featured some pearls. But, afer sitting on it for a few months, I started to have doubts. I began to think that perhaps the flower wasn't large enough to make the statement that I had envisioned. Since I am not wearing a veil, the flower needs to be my "statement piece," if you will. So...I thought that I would try my hand at making one myself!

1. To start, I purchased an ivory colored peony from Michaels to use for the petals, as well as some ivory thread and champagne pearl beads for the center of the flower.
- Note: make sure you find a flower with loose petals that will detach from the center of the flower (the center piece should come out). If you select a flower with petals that are glued together, you will not be able to get it to lay flat on your head as easily!

2. Pop the flower off of the stem and separate the petals.
3. Next, I arranged the petals in a stack to my liking. I noticed that the flower was a little larger in diameter than I would like, so I also incorporated a trick to decrease it!

4. I took the 2 largest petal shapes and cut them apart so that each petal was separate (or in pairs).


I then used straight pins to fasten them in place, and I sewed a few stitches to hold them to the flower petal shape used for the bottom of the flower. With this method, I was able to maintain the fullness of the flower while simultaneously making it smaller in diameter.


5. Layer by layer, I pinned the flower petals back together in a stack. I used this technique to ensure that the petals wouldn't slip and shift as I was sewing the flower together.

6. Next, I sewed champagne pearl beads to the center of the flower one at a time. I tried my hardest to place my stitches in close proximity so that they were easier to cover up when I finished.

7. I cut a scrap of plain ivory fabric into an oval shape, and sewed a hair comb to it. You could fasten a thin barrette or other clip as well if you prefer.

8. Using a few straight pins, I attached the comb piece to the back of the flower. I then tested the placement of the comb in my hair. DEFINITELY make sure you do this before completing the hair piece; if it is too high/low, the flower might flop around awkwardly on your head! I actually left my comb pinned/didn't finish the flower completely until after my hair trial. At the trial we tested the comb placement, and I was able to adjust to make certain that it was in the ideal location!
9. Using a hot glue gun, attach the fabric/comb to the back of the flower. Let dry.


Ok class...questions? Comments? Concerns? Compliments (haha...)?
Subscribe to:
Posts (Atom)
